

Step by Step Tutorial


Step by Step Tutorial
By default, when you first start WorldMerge, the WorldMerge
project wizard is started allowing you to create a new mailing
project. You can also create a new mailing project at any time by
pressing the New Project button![]() on the tool bar or selecting New from
the File menu. WorldMerge allows you to create and manage as
many mailing projects as you wish.
on the tool bar or selecting New from
the File menu. WorldMerge allows you to create and manage as
many mailing projects as you wish.
A mailing project is the paradigm for WorldMerge. It groups your contact database, message, and the recipient status for each record in your list, such as the selection state and send status of each recipient. Please note that your database is not imported into WorldMerge, only the link to your existing database is stored within the project.
To create a new mailing project:
1. Press the New Project button![]() on the tool bar, or
select New from the File menu. The WorldMerge Project
Wizard will now prompt you with several questions.
on the tool bar, or
select New from the File menu. The WorldMerge Project
Wizard will now prompt you with several questions.
2. Select a message file. Usually you will start a new project with a new message and compose it later, but if you have an existing message you would like to use, select Existing Message and supply the path to the message file in the space provided.

3. Now select the database type and file that contains your contact database. WorldMerge accepts Microsoft Access, Microsoft Excel, comma-delimited text, or tab-delimited text databases. Please note that if your database is in a comma or tab-delimited text format, the field names must appear in the first line of the file. Once you have selected a database type, supply the full path to the file in the space provided.
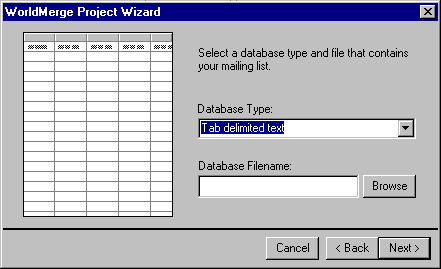
4. Once you have selected a database, WorldMerge will prompt you to select the field in your database that contains the email address.

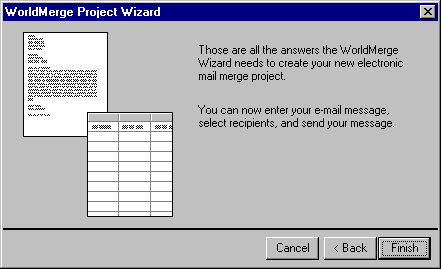
5. That's it!. When you have
finished creating your project, you can save it to disk by pressing
the Save button ![]() on the tool bar or you can select Save from the
File menu. Now you're ready to begin composing your message.
on the tool bar or you can select Save from the
File menu. Now you're ready to begin composing your message.
After you have created a new project, the next step is to compose your message. How you do this will depend upon your particular situation. Do you want to personalize each message that is sent or do you want to send the same newsletter to each recipient? Will you be adding attachments to your message? Here are a few options:
A Simple Newsletter-type Message
Suppose your database looks something like:
user1@host.com
user2@host.com
user3@host.com
Note that the above database contains only e-mail addresses, so personalization is not possible. A sample message could look something like:
To: EMAIL
Subject: May NewsletterHi!
Welcome to May edition of the SuperSaver newsletter. In this edition
you'll find...........
A Personalized Message
Note that this database contains specific customer information.
NAME,EMAIL,INVOICE
Terry,user1@host.com,123
Tammy,user2@host.com,456
Tom,user3@host.com,789
A sample personalized message could look something like:
To: EMAIL
Subject: Invoice # [[INVOICE]]Dear [[NAME]],
Thank you for your recent order. If you have any questions, please include your invoice number [[INVOICE]] when contacting our customer service department.
Thank you,
The ColoradoSoft Team
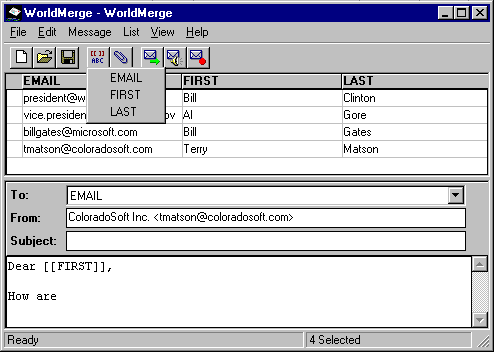
Adding merge fields to your message is easy with WorldMerge. Press
the Merge Fields button![]() on the tool bar or right-click your mouse when inside
the message composition window. A list will appear showing you the
available fields within your database. Just click on the field. Note
that the field will be inserted at the current edit point (the point
where your cursor is) within the message.
on the tool bar or right-click your mouse when inside
the message composition window. A list will appear showing you the
available fields within your database. Just click on the field. Note
that the field will be inserted at the current edit point (the point
where your cursor is) within the message.
To add an attachment such as an image file or Word Document to
your message, just press the Attach button![]() on the tool bar or select
Attach from the Message menu. New in version 3.0, you
can send a customized attachment to each recipient.
on the tool bar or select
Attach from the Message menu. New in version 3.0, you
can send a customized attachment to each recipient.

In order to send a unique or customized attachment to your recipients, select the "Customized attachment for each recipient" button in the dialog box above and press OK. Note that to use this feature you must have a field in your database that contains the full path and file name of the file you wish to send, and you must send using the "Merge" method.
After you select the "Customized attachment for each recipient" button and press OK, the Custom Attachment dialog box will appear. Select the field from the drop down box that contains the file information and press OK.

To send the same attachment to your recipients, select the "Same
attachment file for all recipients" button in the Message Attachment
dialog box and press OK. A Windows File Open dialog box will appear.
Select the file you wish to attach and press OK. WorldMerge appends
the attachment information to the beginning of the message. This text
will not appear in the final outgoing message. All attachments
are added after the message text. A maximum of 20 attachments are
allowed per message.

By default, WorldMerge selects all recipients in your database when you create a new mailing project. A selected recipient will be sent your message, while an unselected recipient will not. WorldMerge distinguishes unselected recipients by graying the entry in the list box. To change the selection state of a particular recipient, just left-click on the record. Also, menu commands exist under the List menu to select or unselect the entire list.

You can also select recipients based on a database query. This is a powerful way to select recipients based on a user-specified condition. To select recipients based on a query, select Select on Query from the List menu.
For example, your database may contain a field such as PRODUCT, which specifies which product a person has purchased. If you want to send a message to only those persons in your database that have purchased WorldMerge, you would select PRODUCT in the first pull-down, select equals in the second pull-down, and type WorldMerge in the edit box.

Note that when you save a project the recipient selection information is also saved.
When you have composed your message and selected recipients, you are now ready to send your message.
Note: It's a good idea to save your project before initiating a send
There are two send methods within WorldMerge. The method you chose will depend upon your particular situation.
Send Broadcast![]() sends the same message to all selected recipients with
no personalization, even if you have added merge fields in your
message. This method is great for sending newsletters or other
announcements that don't require personalization. You can send
approximately 8,000 messages per hour* in Broadcast mode.
sends the same message to all selected recipients with
no personalization, even if you have added merge fields in your
message. This method is great for sending newsletters or other
announcements that don't require personalization. You can send
approximately 8,000 messages per hour* in Broadcast mode.
Send Merge![]() sends a personalized message to each recipient. This method is great
for sending invoices, statements, and other messages that require
specific customer information in each message. You can send
approximately 400 messages per hour* in Merge mode.
sends a personalized message to each recipient. This method is great
for sending invoices, statements, and other messages that require
specific customer information in each message. You can send
approximately 400 messages per hour* in Merge mode.
*Speed tests were calculated using a 32K modem during peak evening hours.
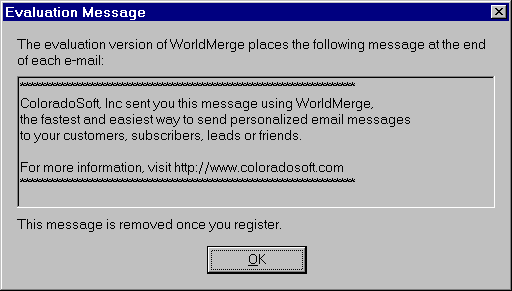
NOTE: In evaluation mode, the following dialog box will appear prior to sending. This is a reminder that an ad will be placed at the end of every message. This dialog as well as the ad are removed once you register.
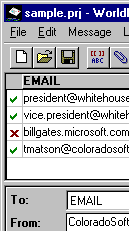
During the send process, WorldMerge will update the send status of messages as they are sent. The status appears as a green check mark or red 'x' to the left of the recipient. A green check mark means that the server has sent the message on it's way. A red 'x' means that the server was unable to send the message due to an error.
The Advanced Message Options are accessed from the WorldMerge Message->Options menu item.
Broadcast Message Recipient Text
This is the text that will appear in each recipient's To: header
field when you do a broadcast send. When sending a newsletter, you
might enter something like NewsletterRecipients@yourdomain.com.
User Header Entries
WorldMerge allows you to add your own header information. Message
header is used by different mail clients to do different things, and
most header information isn't seen by the end-user. You can enter as
many header/value pairs as you wish. When entering more that one
header, just hold down the CTRL key while you press return to advance
to a new line.

The Reporting option is accessed from the WorldMerge Message->Reporting menu item. Creating a send report allows you save and view detailed SMTP server status of each message sent by WorldMerge. This information can be used to determine any errors that may have occurred when sending to a particular recipient.
Generate Send Report
If this option is enabled, WorldMerge will write the SMTP server
status of each email sent to a report log file. The Email address and
status of each item is written to the file at the time the email is
sent.
Report File
Specify the full path and name of the file that will contain the
report information. You can then view the report file using a text
editor such as notepad.
